You’ve done it! Having taken advantage of our informative online resources, you’re now a keen analyzer of User Intent and a master of Search Engine Optimization. You’re a regular web content wizard. Unfortunately, posting your SEO blogs doesn’t happen by magic. There are multiple steps involved in publishing engaging blog posts to WordPress that meet the needs of both your business and your users.
So, now that you’ve written something, what exactly do you need to do? Well, Lifted Logic has a lot of experience in this subject and thought you might like some answers. Here’s a step-by-step guide for posting SEO blogs in WordPress.
Before we continue, though, if anything we mentioned above doesn’t apply to you, we strongly recommend you check out our educational content. We have loads of articles covering topics like How to Think like a User and the basics of SEO Statistics. A firm grasp of the fundamentals of SEO writing makes this whole process much more straightforward. Trust us.
Step #1: Create A New Post
Now that you’ve got content to populate your website, you need to create a new post. Well, duh, but hear us out, though! Getting a handle on navigating WordPress can be a journey, and it’s important to know the bends and turns along the path.
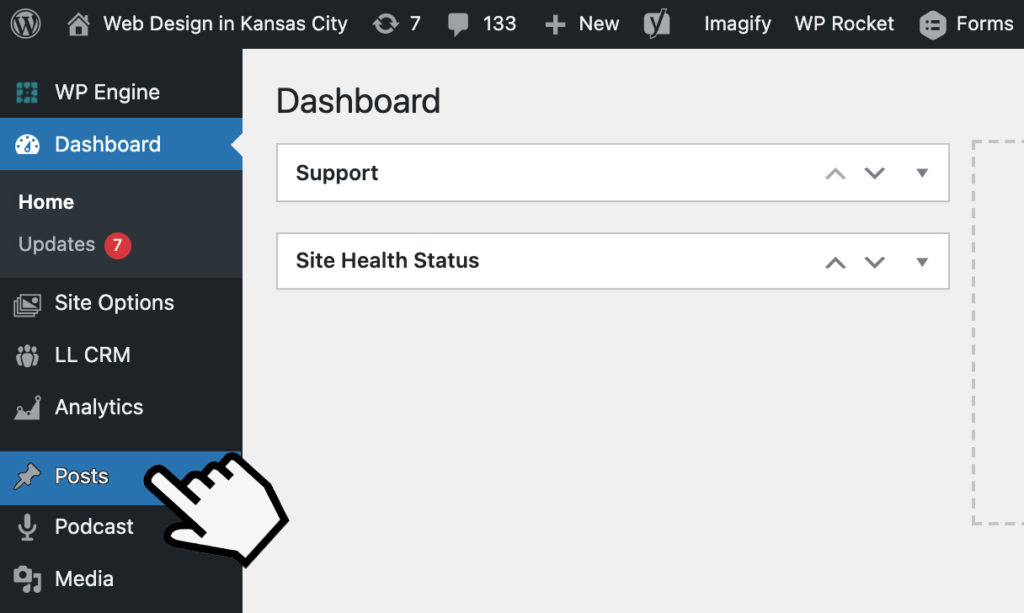
When you open up the backend editor for your website in WordPress, go into the Posts tab. Once open, the Posts Screen will be where you manage all the different content for your blog. You can read, edit, tag, sort, and delete any of your SEO blog posts from this page. This will be the hub for your written content.

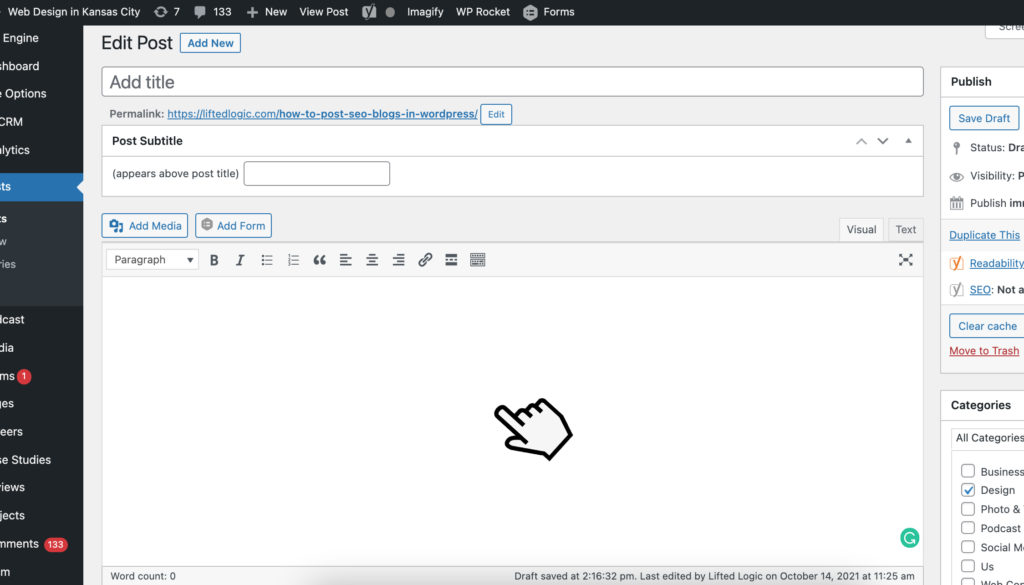
At the very top of this page, you can find the ‘Add New’ button in blue and white. Clicking that button will create a new, blank blog post draft in WordPress, which you get to populate with content.

WordPress In A Nutshell
Now, you may be wondering: why is this piece geared so specifically towards posting SEO Blogs in WordPress, and not, say, Shopify, Wix, or Squarespace? While we have strong feelings about template-based Website Providers, this is a valid question. It all comes down to versatility.
WordPress is a powerful semantic publishing platform, which means it is optimized for sharing written content, and then processing that content for information searching and data integration. You know, only the bedrock of SEO!
Though it started as a platform for posting blogs, it has become the single most widely used Content Management System (CMS) Software on the internet. With it being both free and open-source, WordPress is the perfect platform to post your website content and flesh out your business in the virtual space. Additionally, by being a semantic publishing platform, the site is easily crawlable by search engines like Google and designed to accommodate SEO best practices.
We’ve built a lot of websites on a lot of CMS platforms here at Lifted Logic and firmly believe WordPress to be the best. We have a lot to say on the subject, so make sure to check out some of our color commentary on Why We Love WordPress.
Step #2: Add Your Content
It’s time to populate it with your SEO blog content! At the center of the page, you’ll find the “What you see is what you get” (WYSIWYG) text box. This is, much like its name describes, where all your written content needs to go and provides you a limited preview of what your content will look like published to your website.

Before plugging your content onto the page, it may prove helpful to edit your blog posts in another program. We all make mistakes while writing; it’s part of the process. Perhaps you’re throwing around industry-specific terms without considering your users. Maybe you tend to write sentences longer than 20 words, or you’re overusing your keyphrase. It happens to the best of us. However, without careful attention, these mistakes can build on top of one another and make a significant difference in the performance of your blog content in WordPress and online generally.
There isn’t inherently a wrong way to review your work, so long as you use SEO best practices, but WordPress’s text editing tools aren’t as comprehensive or intuitive as systems like Microsoft Word or Google Docs. You may find that editing in WordPress makes navigating your SEO blog copy more difficult or that it is slightly harder to look over your work as a whole in a smaller display space. We know the feeling all too well.
At the end of the day, though, what matters most is your comfort level. If you’re happiest editing, approving, AND posting SEO blogs in WordPress, then keep on keeping on.
No matter how you review your content, though, it needs to go into the WYSIWYG text box. With a basic page layout, anything not put into this text box won’t be visible to users.
An additional tip for the WordPress spelunker: In the Publish box, the interactable dropdown on the top of the right of the page, you will find the Save Draft button. This button is your friend. Clicking it saves all changes made to your SEO blog post draft, preventing any work from disappearing where your internet to go out or you to close the tab accidentally. Save your work often, especially if you’re not planning on sitting down and posting everything in one sitting.
Step #3: Implement Your Keyphrase
If you’ve comfortable writing for SEO, you will have done most of the components of Step 4 by the time you’re ready to post in WordPress, but that doesn’t mean you shouldn’t have them in mind. The three things you will need to do to implement your keyphrase while posting SEO blogs are:
- Include A Title
- Format Your H1
- Update Your Permalink
You need to make sure you’ve done all three of these actions before moving on to the next step. To make this easier, let’s go through this together!
Include A Title
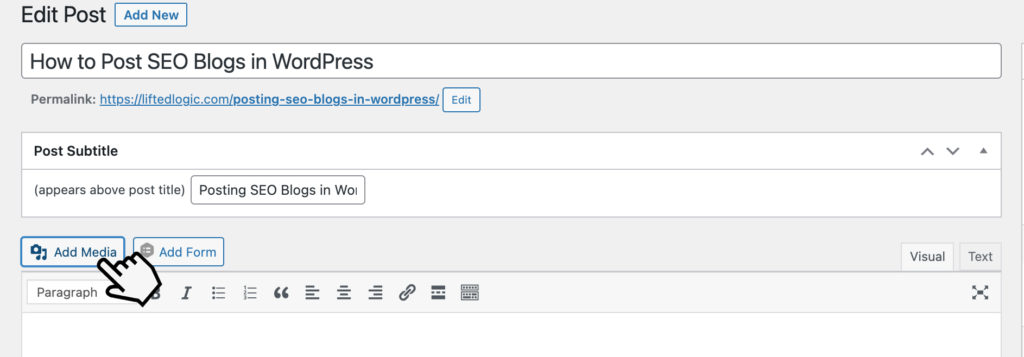
At the top of your post’s page, there is the “Title” text box. This is where you plug in the title you’ve made for your piece. We’ll title our example SEO blog post “How to Post SEO Blogs in WordPress.”

Your title should reflect or include your SEO keyphrase but doesn’t have to be a one-to-one match. It’s crucial to optimize your title tag for likely user queries, but it’s also important that the blog post reads well and doesn’t look like you put it together just to fit an algorithm.
Your users want to hear from you, so you should make sure what you’re saying is authentic.
Format Your H1
Your H1 tag is the programmatic tag that both search engine bots and users read to see what an SEO blog is all about. An improperly formatted tag can, as a result, really do a number on the ability of any search engine to call out your content as something matching their online queries. As a result, you should try to make your H1 as close to your exact keyphrase as possible.
The H1 we’ll use for our blog How to Post SEO Blogs in WordPress is “Posting SEO Blogs in WordPress.” In this case, we’ll be using our Keyphrase exactly!

Normally, this step would be part of creating a title. However, if you are a client of Lifted Logic, you should make use of our unique “Post Subtitle” feature to better customize your post. This allows you to provide the keyphrase for your blog post without it being the sole page title.
Update Your Permalink
The last thing to do is make your page’s URL slug match your H1 tag or keyphrase. The shorter, the better. Your permalink is an SEO indicator, and since your blog’s URL is a factor in your ranking, it’s important to cover your bases. You would never want something as simple as a URL to f*ck with your content’s performance.

I hit the edit button and changed the permalink to our blog post’s keyphrase: Posting SEO Blogs in WordPress. Voila! Now that we’ve completed these three phases, it’s off to the next step!
If any part of this step is stumping you, Lifted Logic offers free SEO blog training workshops for businesses interested in increasing site traffic. Contact us to start upping your SEO game!
Step #4: Establish A Visual Hierarchy
This step is a little more subjective. It’s all about making your content easier to consume. Depending on what you’re writing and who you’re writing for, that may need to look different on a post-by-post basis. Though you should strive to keep your voice and tone consistent, there’s nothing wrong with experimenting with how you present yourself online.
WordPress provides several tools to change and format your SEO Blog copy. One of these tools is being able to adjust Headings, preset formatting that changes the size and mapping of text. H1 is usually your title header, but you also have H2s, H3s, and more. Headings are how WordPress breaks apart the content of your SEO blog for user navigation.
WordPress also allows you to format text as if it were a heading without making it an actual, navigable subsection header. This gives you far greater formatting control over the aesthetics of your posts in WordPress. You can use this formatting shortcut in a bunch of ways, but most notably:
To establish connected segments of your writing
To create subsections within a piece of content
And even to just make something stand out
Most importantly, though, establishing a stylistic hierarchy in your blog posts in WordPress helps users scan your post for the information they’re looking for. It adds necessary visual interest by breaking up any long walls of text.
Step #5: Add Images
Building out a visual style for your page only for embedded images to completely change the look and feel of your blog post is f*cking frustrating. But, potential headaches aside, images are a must when crafting an SEO blog post.
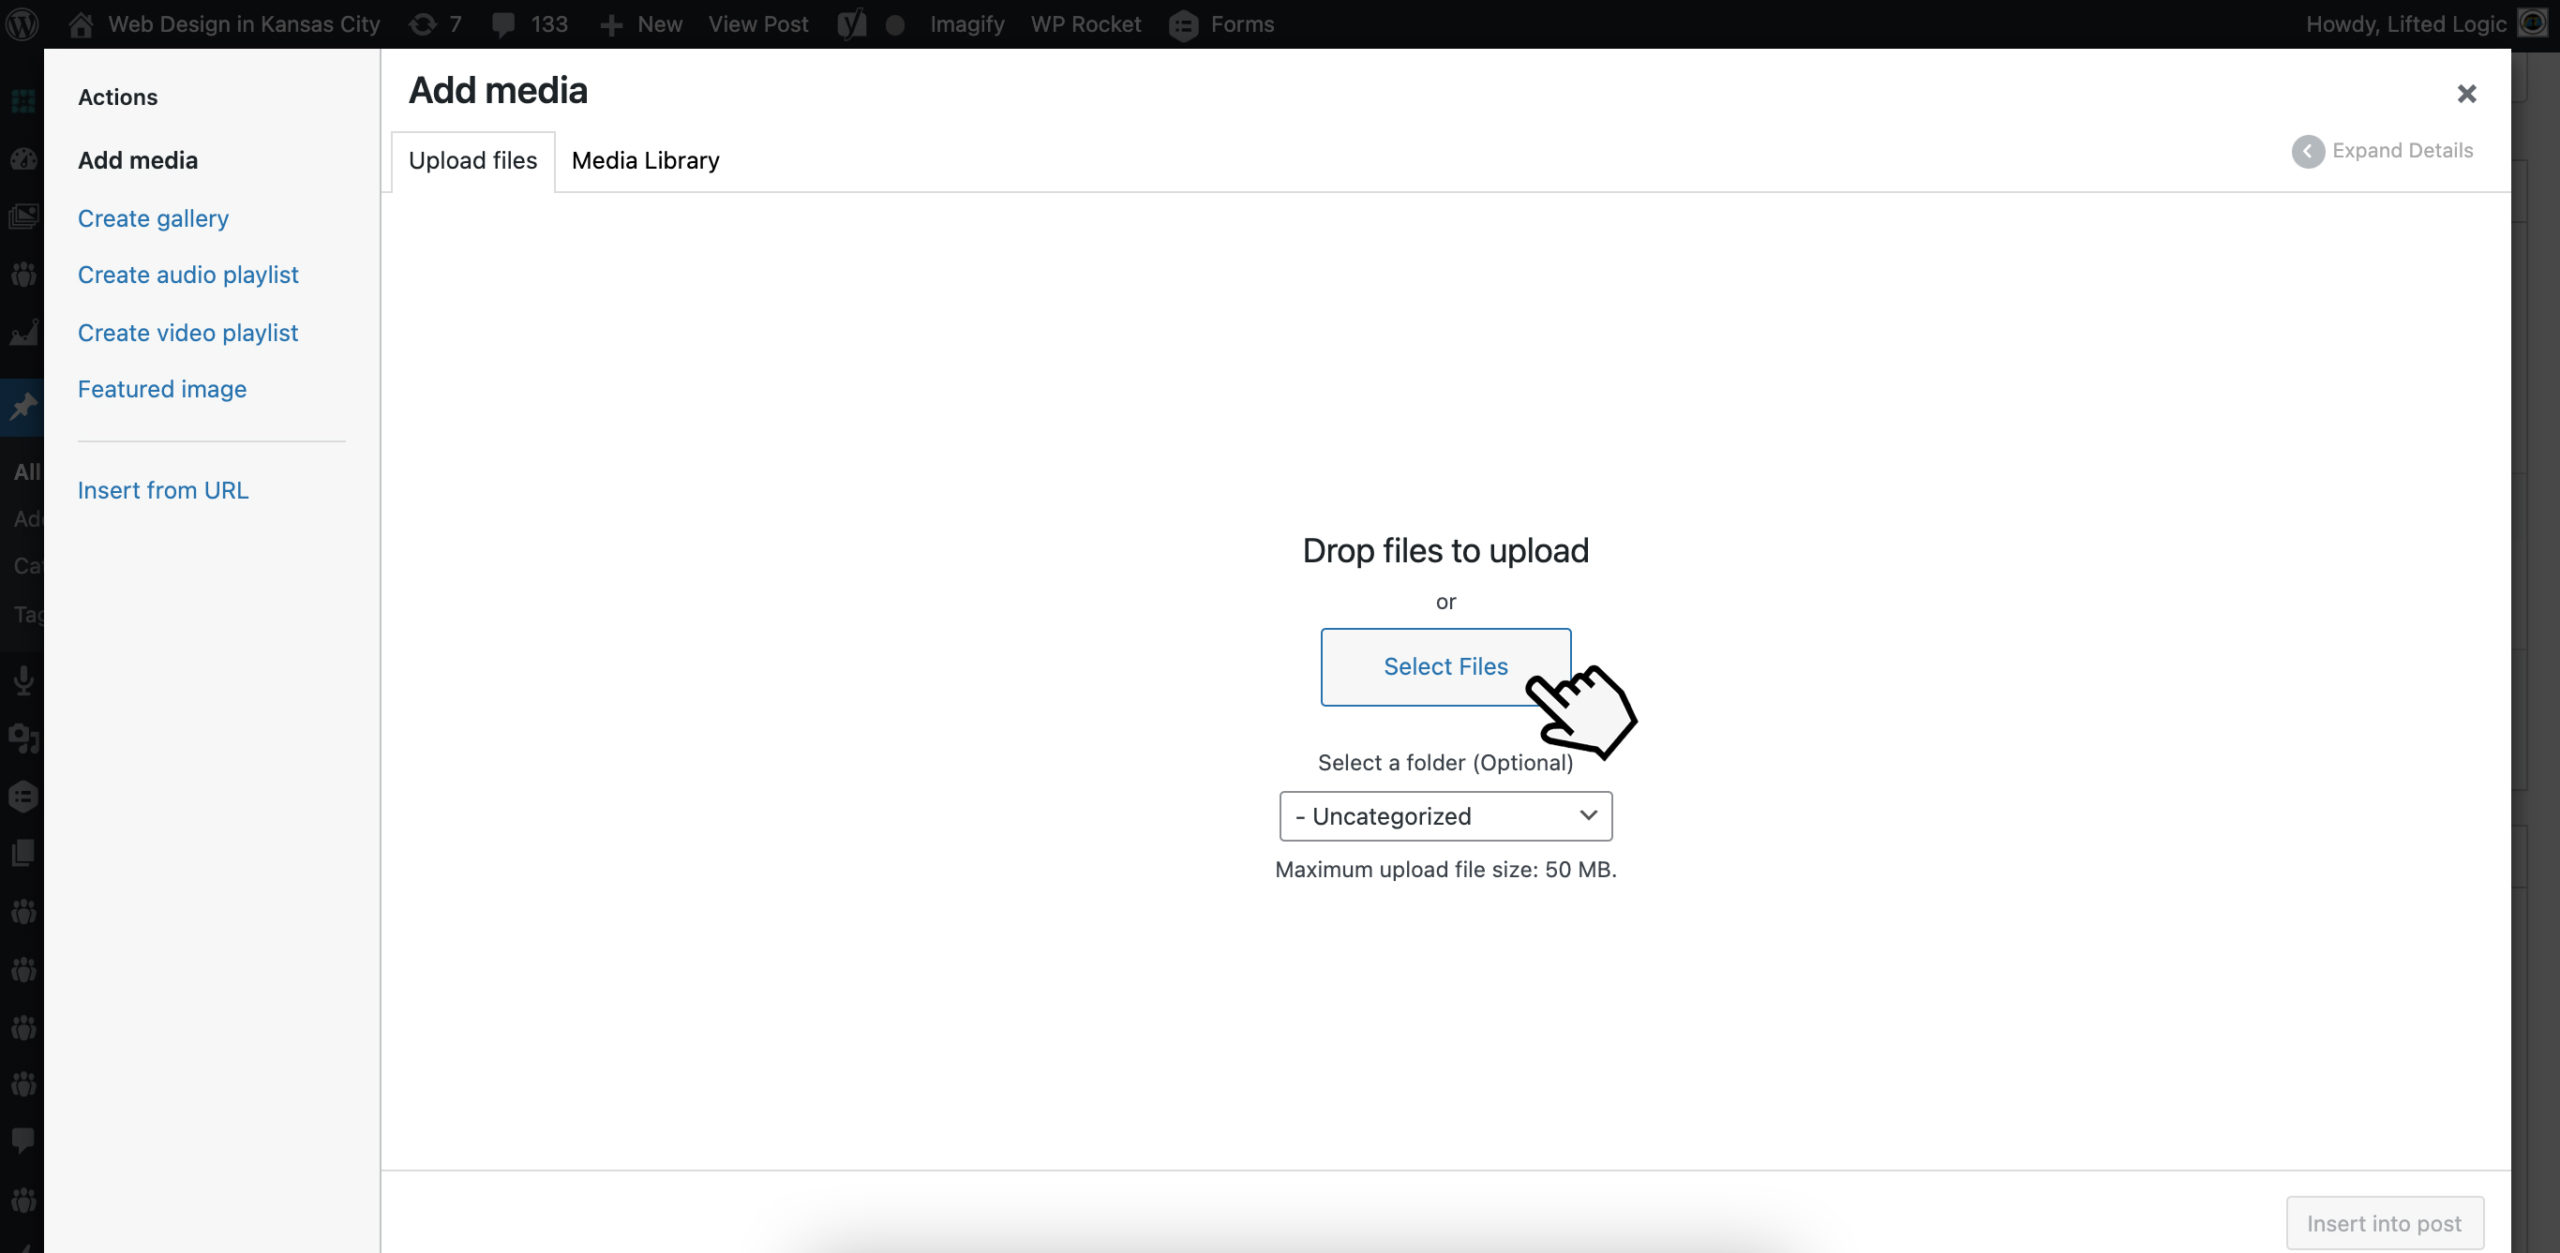
If you’re unsure how to do this, I’ll walk through the process in our demo blog post, How to Post SEO Blogs in WordPress. To add an image, you need to go to the add media button directly over the WYSIWYG text box. Then click it!

Once you do, a new window should pop up. From this window, you can either upload images directly to WordPress or pull images from pre-existing image galleries. Since our demo blog focuses on posting SEO blogs to WordPress, I’d want to make sure I found images suited to that topic. This strengthens the SEO of your blog post!

Beyond just being an SEO metric, images do a world of good for your users. Including relevant images in your posts will help visual learners digest your written content more easily. After all, not everyone thrives on staring at tiny text on a page. Making your content as user-friendly as possible is always a great idea.
Images are also a way to break up paragraphs and disperse the ever-dreaded “wall of text” quality some blogs develop. Likewise, placing images on the side of text or in-line can create a far more dynamic reading experience for your users.
Want even more information about how to master adding images to your blog? Check out our resource on How to Optimize Images for the Web.
Step #6: Use Your WordPress Plugins
You’re nearing the end of prepping your post for publication in WordPress. What more could there possibly be to do?
Now’s the perfect time to take advantage of any last-minute tools and resources you might not have had the opportunity to check before now.
“What are plugins?” you may ask?
Plugins are specialized programs for WordPress. You can use these tools to double-check your SEO performance on a blog page before you post it, provide protection from hacking or malware, and present layered analytics data right within your dashboard.
We especially recommend the Yoast plugin. An incredibly useful tool for SEOs and SEO blog writers, Yoast appears at the bottom of the page and allows you to set specific meta titles and descriptions for all your posts. It also automatically scans your post for keyword distribution, readability, and more.
Pretty helpful! It’s worth mentioning that if your build came from Lifted Logic, this tool comes automatically installed. We got your back
Step #7: Schedule & Publish Your Post
All that remains is posting your SEO Blog in WordPress! We now return to the Publish box at the top right of the page. Not just for saving drafts, you should see controls for draft options, visibility controls, and publishing tools from this dropdown. The bottom right corner of the publish box will also have the big, blue Publish button!
Now that your post is ready to be published, you have some options! You can either click the Publish Button right away or click the Publish Immediately Edit button to schedule the blog to go live in WordPress on a specific month, date, and time.

You can also publish it but label it private so that users can’t access it. This can give you more time to edit or fidget with the appearance of your page without an unsatisfactory version being visible to everyone who visits your blog.
And, if it’s not ready to be published at all, you can tag the page as pending review, so an editor who has access to your blog can make sure to give it a once-over before you return to publish it.
To wrap things up, we’ll go ahead and publish our demo blog, How To Post SEO Blogs in WordPress. Weirdly meta, right?
And with that, you’ve completed our step-by-step guide on posting SEO Blogs in WordPress. You now have all the knowledge necessary to handle the ins and outs of adding your content to any WordPress blog you create.
Want to learn more about posting SEO blogs in WordPress? Let us help!
Lifted Logic specializes in creating compelling SEO Content for businesses. If any of this process was just too frustrating, don’t worry. We know navigating, crafting, and delivering website content can be a beast. So, why not come to experts for a helping hand?
Reach out. We’ll schedule a one-hour training session for you with our SEO and content experts. We have worked with a wide variety of businesses in various industries and understand the fundamental concepts that apply to everyone, no matter your market.


