Recently, a client called and asked us if we had any tips for how to optimize their images for the web.
The images they were seeing in the Preview Mode of their new website were showing up small and blurry.
While we shared some helpful tips with this client, we thought that many more of you may also have similar questions about image optimization.
Here’s what you need to know about how to optimize images for the web.
WordPress, our CMS of choice, already does some of the heavy lifting for you; it’s estimated that on upload, WordPress automatically compresses images down from 100% to about 82%.
However, this does not change the size of the original image… Only the quality.
If you’re uploading images that are already low quality, too big, or too small, this process could significantly affect the quality in which they appear on the web.
Which brings us to the first thing you should know about how to optimize images for the web:
Images above 2000px wide are not necessary.
One of the biggest and most popular screen resolutions in 2019 are 1366 x 768. This means that an image of 2000px wide or more is already bigger than the entire width of someone’s screen.
Chances are, they don’t need to see the image in that much detail
How to change your image size for the web
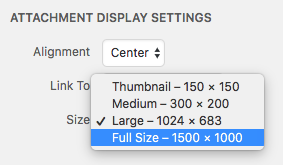
In WordPress, there are preset sizes you can choose from, including Thumbnail (150px wide), Medium (300px wide), Large (1024px wide), and Full Size (the size that your original image was on upload).
Depending on the page or place where the image will live, you may not even need to decide on its size – your website will set it for you.
However, if you’re writing a blog post and would like to include images throughout your content (which is highly suggested!), selecting an appropriate size will be important.
If you need a size in between Medium and Large (as most of us probably would… it’s a pretty big jump from 300 to 1024 pixels!) you’ll have to change the image size using an image editor.
Image editing programs
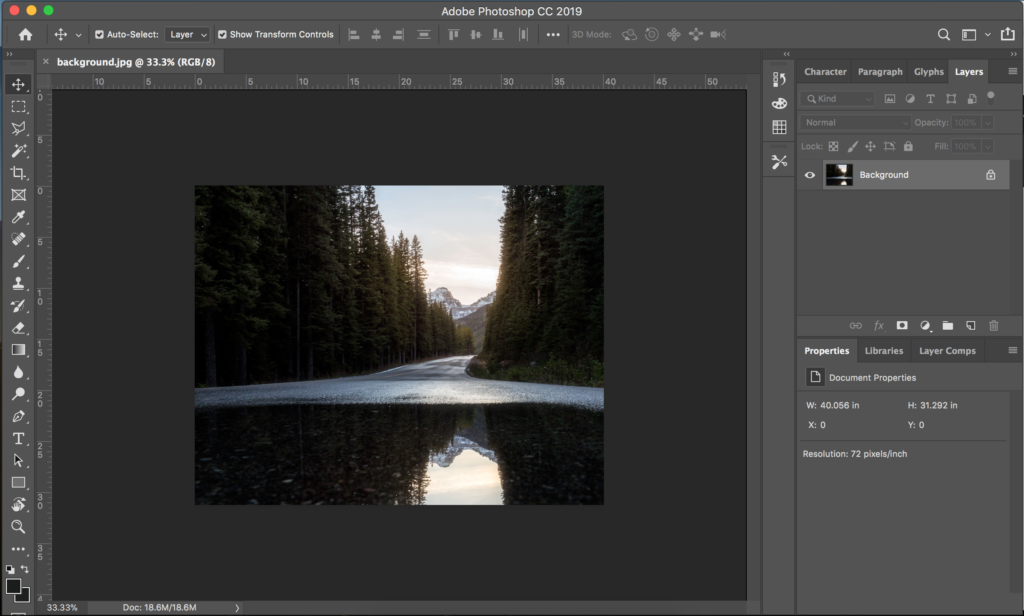
Adobe programs Photoshop and Lightroom are the industry-standard, preferred software and start at just $10/month, which is especially helpful for small businesses who can’t afford business suite accounts. (Pinky promise this isn’t a #sponsored plug! It’s just what we use ourselves.)
If your business can’t afford a Creative Cloud product, an open source (free) photo editor called GIMP (GNU Image Manipulation Program) will allow you to edit image size as well.
Additionally, there are online image editors you can use. The problem with these online image editors is that sometimes you get more compression than you bargain for during the upload and download process.
It’s up to you to decide how you would like to resize your images to best fit your needs.
Image Attributes
Attributing various tags to your images and other media will help search engines recognize what content is on your site and how they should relay that content to users.
Here’s the run down of the various Image Attributes available in a typical CMS:
Title
Titles are for internal use to help you keep track of and easily locate your media files.
Caption
A caption is explanatory text that shows up visually to a user underneath the media when it’s inserted into a page.
Alt text
Text that search engines read to determine what the image is and how it is relevant to that page’s content is called Alt (Alternative) Text.
This is also what a screen reader will read aloud to those who are visually impaired. This text is becoming more and more imperative to include in web-based content due to stringent ADA Compliance rules that ensure all electronic and information technology be accessible to people with disabilities.
Alt text should include the keyphrase being emphasized on that page (For us, an example would be: “Web Development in Kansas City – Laptop”) to assist your SEO efforts for that page of content.
Stay tuned for our upcoming article about how to write alt text for web images.
Note: Each of the above attributes may be edited or changed per page of content. So if you need to reuse the same image on more than one page, this information can be edited without affecting other pages of your website).
Description
Descriptions are mostly unnecessary. (Photographers and visual artists use these to add copyright information or other source attributes.) You may only set an image’s description once and it must stay the same no matter on how many page(s) of the site it will live.
Learn More
Need additional help with compressing your images or optimizing your media for the web? Lifted Logic is just a phone call or email away.
Contact us today if you’d like help with your current website or if you’re interested in collaborating with our team on a new project!

